Theme Installation
Install Quickstart Package (full website like demo)
* With the PRO version, you can download the Quickstart Package to get theme and sample data just like our demo site and access all the template features. This way, you just need to replace the demo content with your own to save development time.
After buying the PRO version, you can log in to the Customer Area and download the file ‘Dummy package (data like demo)’.
Before installing the Quickstart Package, make sure that you have installed WordPress. You can download the latest version of WordPress here. To better understand the Quickstart Package installation process, please see our detailed instructions on how to install Quickstart package.
Install Theme Package
Install Free Template Package: This is the theme pack to use for a new website where you want to build content from scratch without sample data, or to use for your site with existing data. After downloading the .zip file, you can install it via Appearance.
- Log in to your WordPress admin page (usually it’s at: https://yourdomain.com/wp-admin/).
- Navigate to Appearance > Themes.
- Click the Add New button > Upload Theme > Choose File and browse for the file that looks like ‘[theme-name]-wordpress-theme-install-package.zip‘, then click Install Now.
You can see the following install illustration:
After completing the above steps, you can Active the theme to load the new theme style.
After activating the theme, now the frontend may not display the right color that is used on our live demo. However, you still can choose your favorite color or reset the color to default according to the following steps:
Step 1: Go to Admin > Appearance > Customize
Step 2: Navigate to Custom Color Variables and you will see 2 options:
Option 1: You can choose any color for each position of the demo and save
Option 2: If you want to choose the same colour as our live demo, feel free to select any colour and then click on the Default button and save. Now, the default colour should be displayed on the front end.
Now, you can start building content for your website via Admin > Appearance > Customize. To build a shopping cart website, you just need to download the WooCommerce plugin and install it via Plugins > Add New. Then, read the WooCommerce documentation to build your shopping cart features.
Theme Customization
Using the WordPress Customizer, you can edit your theme options and preview the changes before publishing them to your live site.
Once you’ve activated a theme, you’ll see several default WordPress settings in the customizer. The available settings will vary depending upon which theme is activated.
To get started, go to Appearance > Customize to access the customizer. Once the customizer is open, you’ll see a menu on the left and a preview of your site content on the right:
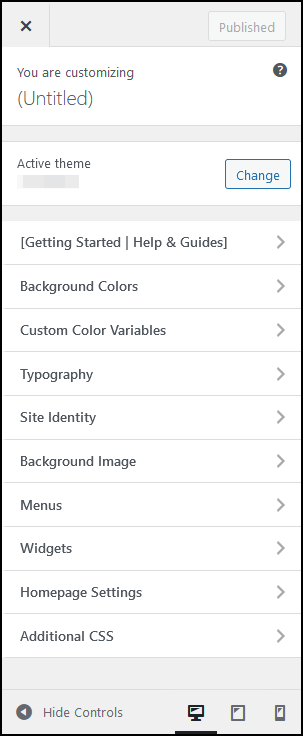
The customizer menu on the left side shows various options that are available for editing in your theme. You can choose from options such as colors, background images, menus, and more. The exact options available depend upon which theme you’ve activated.
On the right side, you’ll see a live, interactive preview so you can test each option in your theme. All changes will instantly appear as you modify customizer options.
To see the settings available within each option, click the title to open the expanded view. Remember, the available settings will be different for each theme.
- To see the interactive preview in full-screen mode, click the Collapse triangle at the bottom of the menu on the left side.
- When you are finished making all your changes, click Save & Publish. If you decide you do not want to save the changes you’ve made, click the X to close the editor and dismiss your changes.
Let’s go over some of the common options available in the customizer.
Getting Started | Help & Guides
This section provides some basic steps for getting started. It is recommended that you follow these steps for a better start. Also, don’t forget to check the buttons below the instructions for more information and to make the most out of your new theme.
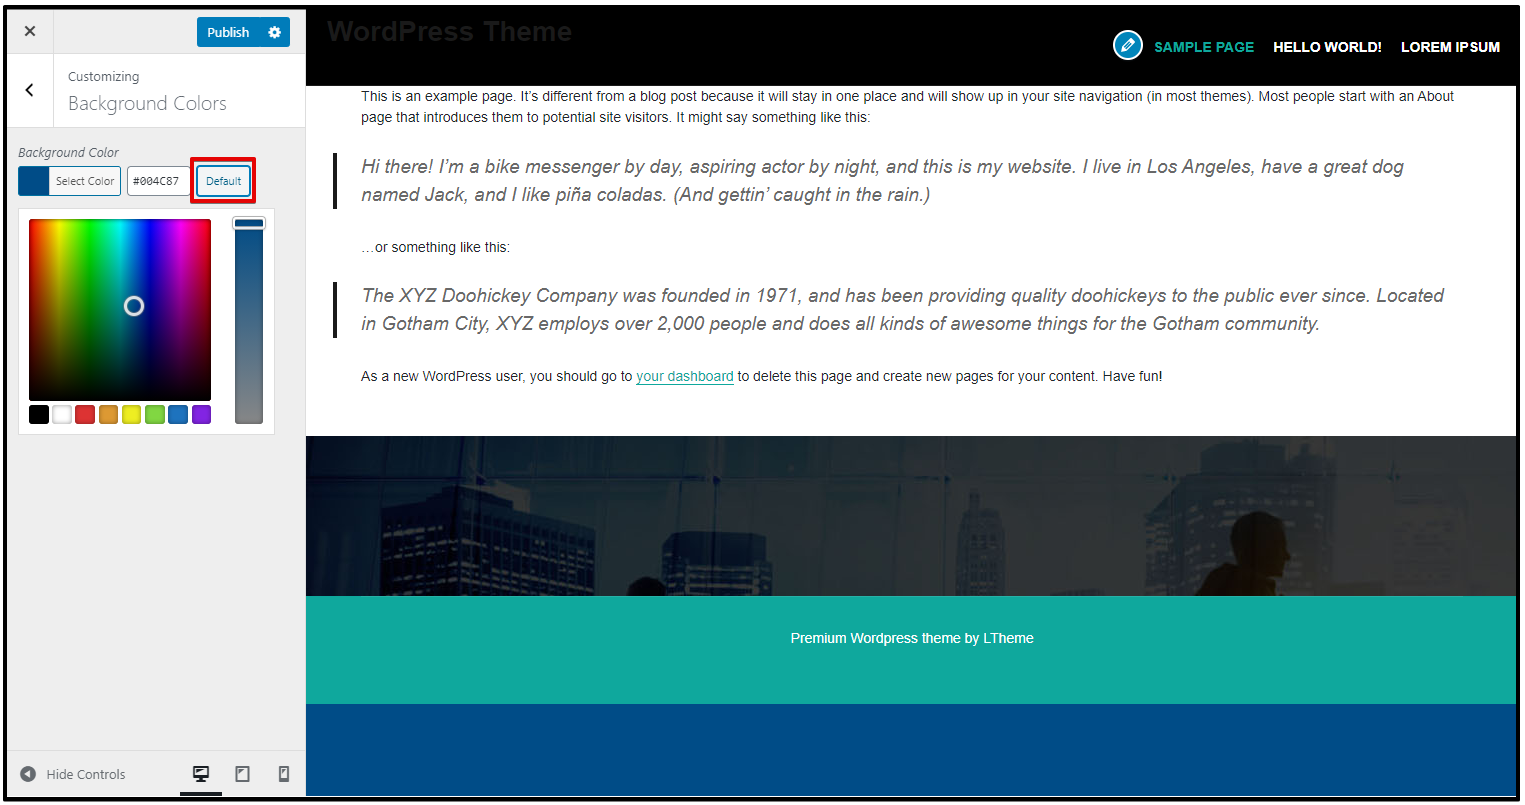
Background Colors
You can change or update your theme background colors right from WordPress Customizer. This option will vary depending on which theme is activated on your website. Just pick the color you want. Use the Default button in case you’d like to revert to the default colors.
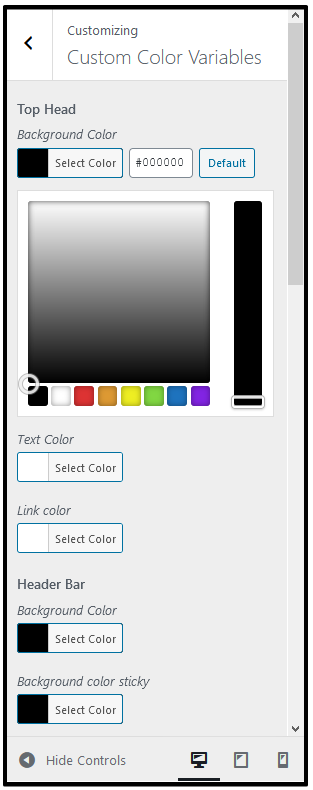
Custom Color Variables
With the Custom Color Variables settings built right into WordPress Customizer, you can now change the default colors used across the entire theme globally and/or in one place. Set the color for the Top Head, Header Bar, Menu Custom, Sub Menu Custom, Footer, and Copyright. Define your project/brand colors in one place and keep everything nice & organized.
Click the Default button next to the color code inside each option if you want to reset it back to the theme’s original color.
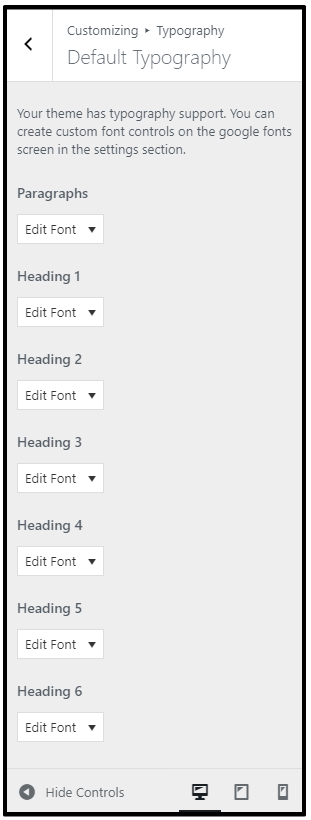
Typography
Typography plays an important role in design. Beautiful fonts create a better user experience, increase engagement, and boost the time users spend on your site.
Typography allows you to tweak typeface to suit your needs. You can use Google Fonts in our theme. You can change the typography on your website without applying any code. It also allows you to control the typography on your WordPress site by adding a Typography tab in the theme customizer. Using the Typography tab, you can change fonts while viewing a live preview of your changes. You can choose font sizes, colors, padding, border, and more.
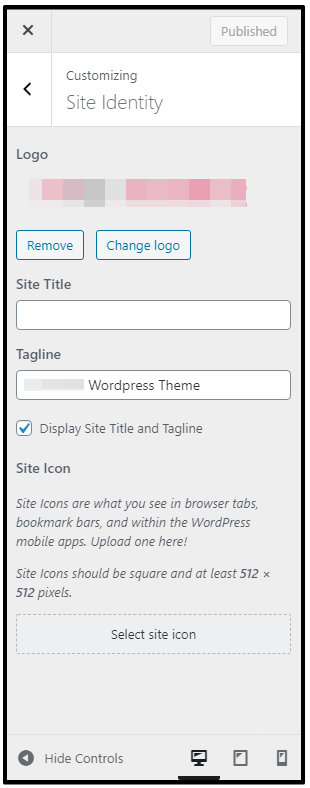
Site Identity & Upload Logo
You can set your site title, tagline, upload your site icon (favicon), and/or your logo here. If you have activated a theme that doesn’t include the Header Image setting (see below), you can also choose whether you’d like to display an Image logo or Dynamic text for your site title.
Please watch this video for more details.
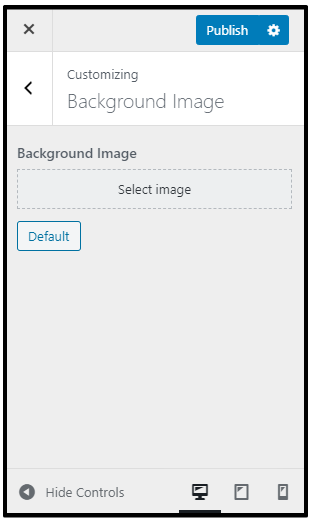
Background Image
Most of our themes come with custom background support through the WordPress Customizer which allows you to easily set a background image for your WordPress website.
To add or change a background image, click on the Background Image option. The panel will now slide in and show you the options to upload or select a background image for your website. Select one and hit Publish to apply your image.
Click Default to reset it to the original settings in case you want to undo all your changes.
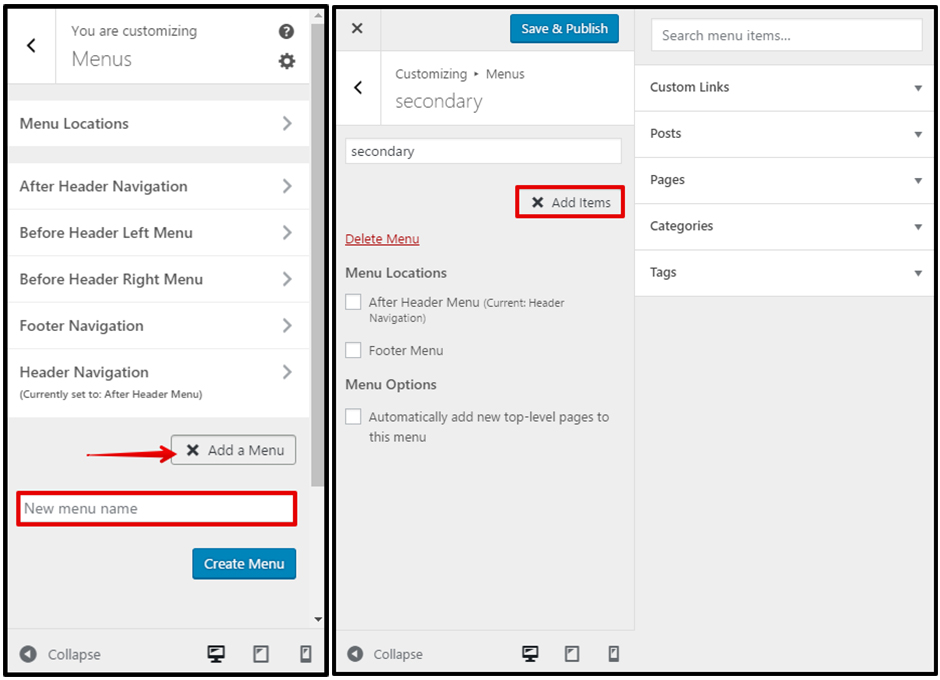
Menu Location
You can create and edit menus, as well as manage their location, within the Customizer. The available menu locations will depend upon which theme is activated on your site.
Click Menu Locations to see the available locations in your theme.
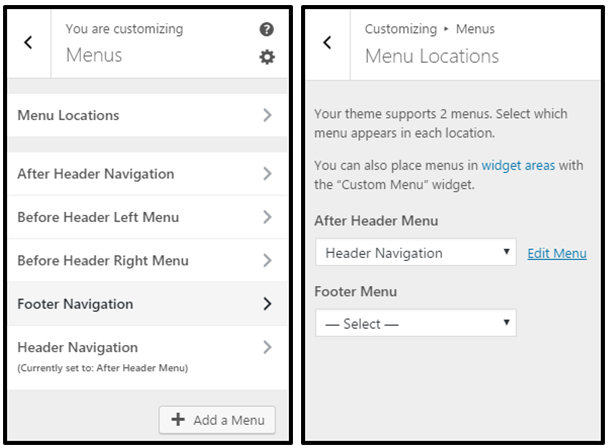
Use the drop-downs to select a navigation menu to display in each available location. Or, if you prefer, you can set both locations to — Select —(in other words, turn them off ) and use a Custom Menu widget in a widget area instead.
Click Add a Menu to create a new menu. Alternatively, you can click on the name of an existing menu to edit it.
- Give the new menu a name and click Create Menu.
- Click Add Items to begin adding links to the navigation menu.
- Click the titles to open the expanded view of the options or use the search field to locate items for the menu.
When you’re finished adding all the menu items, click Save & Publish to preserve your settings.
You can watch this video for detailed instructions.
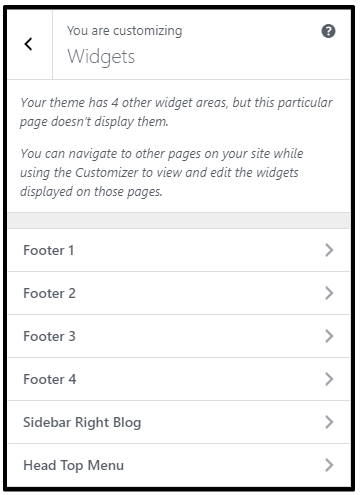
Widget Manager
Some themes offer unique widget areas where you can add widgets to display important information. The exact widget areas available will depend upon which theme is currently active on your site.
Click on any available widget area to open a new panel where you can add and configure widgets.
In the open panel, click Add a Widget to display the available widgets that you can add to this widget area.
You’ll see a list of all the available widgets you can add to the available widget areas. You can directly click on any widget you’d like to add. Scroll down the list or use the Search widgets… box at the top to locate the one you’d like to use.
Note: You can click the Hide Controls button in the bottom left corner of the screen to temporarily hide the Customizer and preview your changes in full-screen mode.
After selecting a widget, you can configure it however you want, then click Save & Publish to preserve your changes.
You can also click Reorder to rearrange the widgets into the order you prefer or to select a new widget area to move the widget into.
Click Done when finished and then click Save & Publish to apply your changes.
Watch the detailed video tutorial:
Illustration of Customizing Widgets in WordPress
Home Page Settings
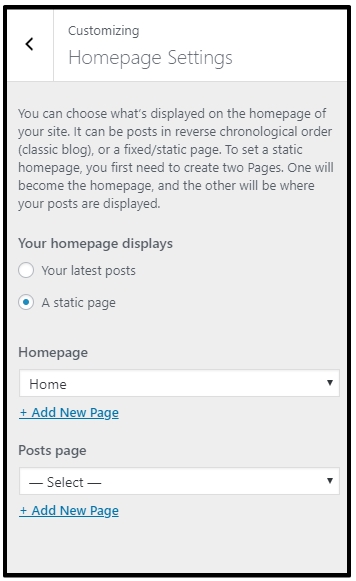
The default setting for the front page is Your latest posts. This setting allows you to display a blog-style front page. You can, however, select any page on your site to be displayed as the front page instead of your latest posts.
If you select A static page, you can select which existing page on your site will be displayed on your front page.
You can also select which page will display your blog posts. This page should be different from the one you’ve selected for the static front page and should not be set to use the Blog Page template.
Notice: If your theme uses the front page to display widgets, the widgets will be displayed regardless of which setting you choose here. If you prefer to display your latest posts or a static page on your front page, you’ll need to remove all widgets from all front page-related widget areas.
Illustration of Homepage Settings Customization
Additional CSS
Add your own CSS code here to customize the appearance and layout of your site. Learn more about CSS
When using a keyboard to navigate:
- In the editing area, the Tab key enters a tab character.
- To move away from this area, press the Esc key followed by the Tab key.
- Screen reader users: when in forms mode, you may need to press the escape key twice.
The edit field automatically highlights code syntax. You can disable this in your user profile (opens in a new window) to work in plain text mode.
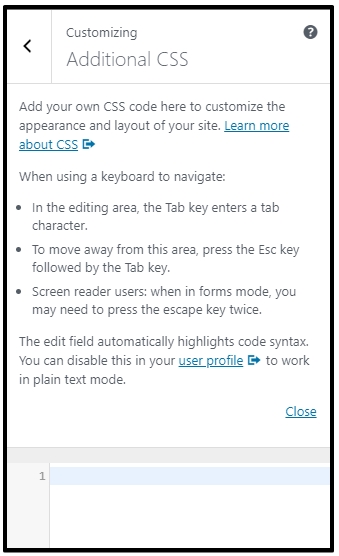
See the step-by-step tutorial below:
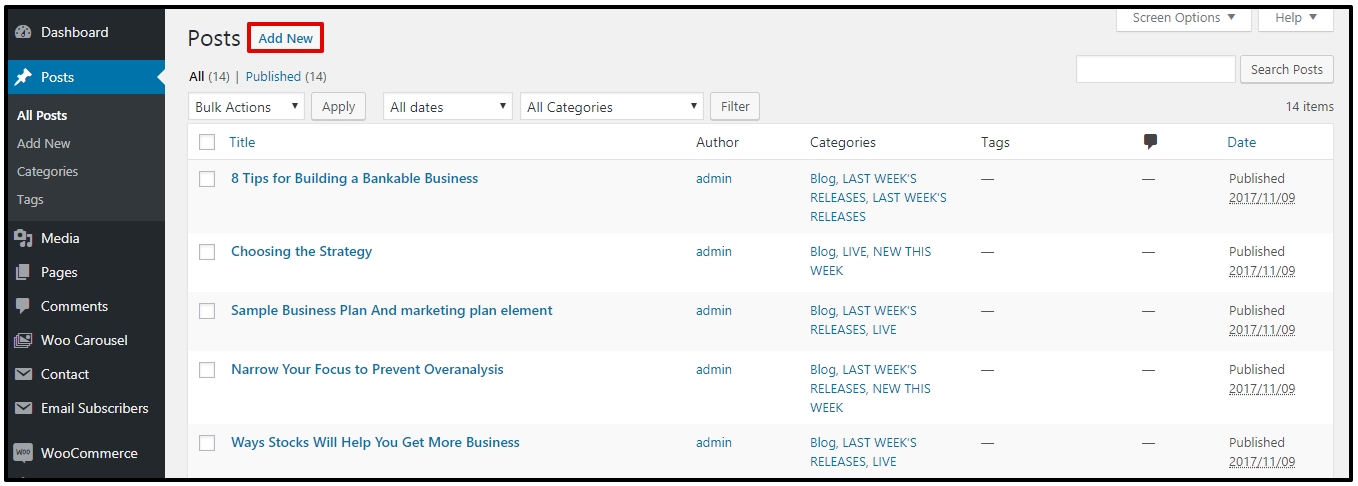
Post Management
This is Posts in WordPress and you can use it to build a blog for your page.
– Go to Posts > Add New to add a new post. You can add various types of items to your post: Video, Audio, Gallery, Quote, etc.
Watch this tutorial for more details:
Using Elementor Page Builder
A WordPress page (not a post) can be configured to use a template by selecting an available template option Page Attributes section in the right sidebar of the page editor screen.
It’s about time for a live page builder, with no limits in design. A page builder that delivers high-end page designs and advanced capabilities, never before seen on WordPress.
Never again work on the backend and guess what the frontend will look like. With the Elementor page builder, you edit the page and simultaneously see exactly how it looks like. Elementor features live design & inline editing, so the whole process of writing and designing is done directly on the page, with no need to press update or go to preview mode. It also works perfectly with or without Gutenberg. Blocks are pre-designed section templates that can be easily combined into any page. Blocks include a variety of categories: services, testimonials, call to action, and more. Save and reuse Elementor templates on different pages, or export them to a different website with a click. With Elementor’s unique features, you can create websites that have that certain ‘designer touch’. Among our page builder features are Box Shadows, Background Overlays, Hover Effects, Headline Effects, Animations, Shape Dividers, Gradient Backgrounds, and much more.
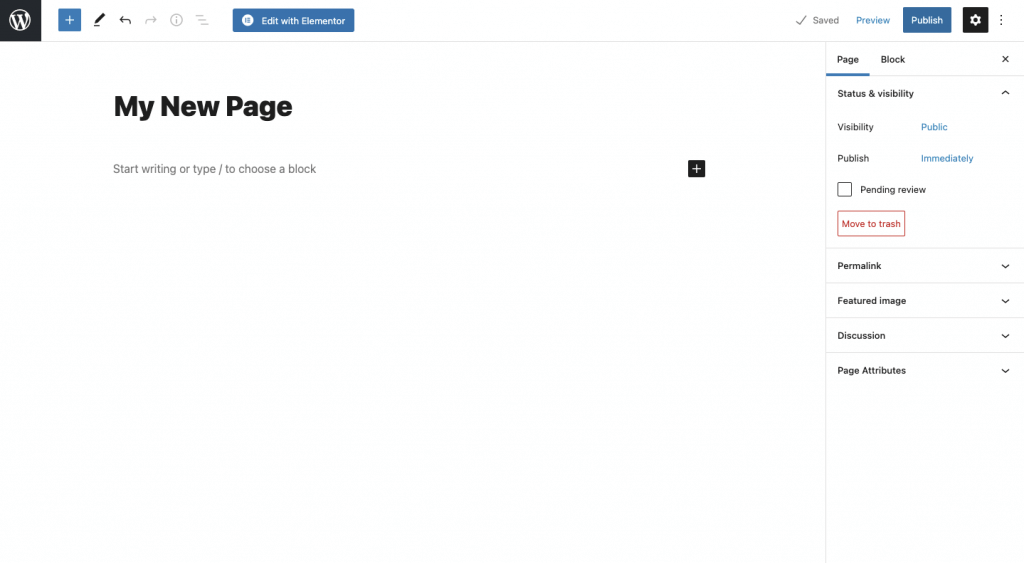
Create a New Page
Step 1: From the WordPress dashboard, click Pages > Add New.
Step 2: Name your page
Step 3: Click the Publish button (Visibility options may be set if the page is to remain private)
Step 4: Click Edit with Elementor to enter the Elementor Website Builder
Edit page with Elementor
Elementor uses three main building blocks: Sections, Columns, and Widgets.
Sections are the largest building blocks, and inside them are groups of Columns. Columns sit inside of Sections and are used to house the Widgets. Widgets are placed inside of Columns.
You control the Section, Column, and Widgets with their handle.
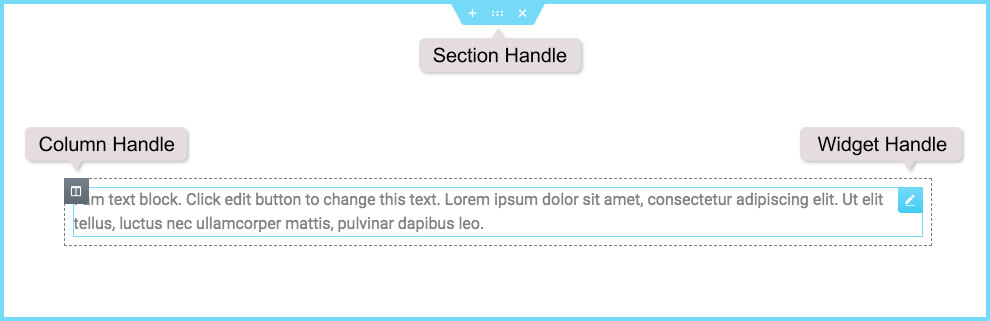
To edit the Section, Column, or Widget, right-click on their handle.
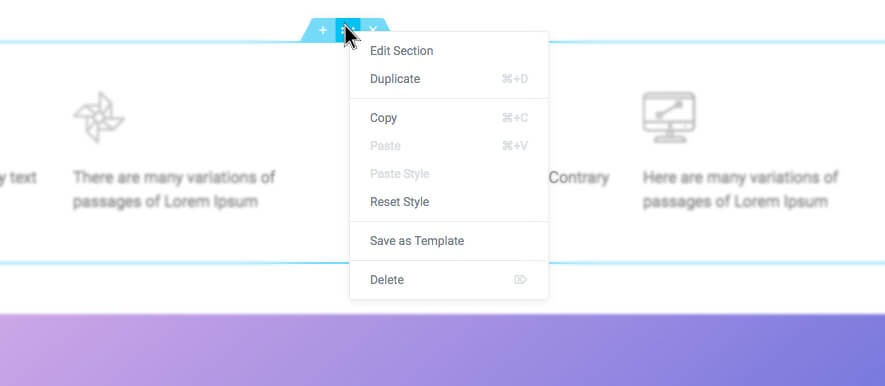
Section
Step 1: Click the ![]() icon to create a Section, or click the
icon to create a Section, or click the ![]() icon to use a pre-designed Page or Block from our library
icon to use a pre-designed Page or Block from our library
Step 2: Set your Column structure
Step 3: Right-click to Edit, Duplicate, Copy, Delete, etc.
Step 4: Use the Section handle to: add a section, drag a section, or delete.
Column
Step 1: Set the Columns Width. You can do it under Layout, or drag the dashed line between the Columns.
Step 2: To add more Columns Right Click > Add New Column
Step 3: Insert Widgets to your Columns
Widget
Step 1: Insert Widgets inside your Columns
Step 2: A Widget width is set by the Column width
Copy or Delete All Content
You may Copy or Delete all content on your page by right-clicking on the empty section near the add section and templates icons. You can also paste items on another page on the same website.
For detailed instructions on basic manipulation of Section, Column, Widget with Elementor, you can watch this video tutorial:
Navigator
Navigator is a navigation tree panel providing easy access to every element on the editor with just one click. Navigator enables the user to drag elements throughout the page and edit them, quickly and easily.
Navigator is particularly useful for long pages or pages with complex multi-layered design, and for elements combining Z-Index, minus margins, position absolute, etc. It allows you to access element handles that may be positioned behind other elements.
By the way, check out our tutorial below:
For full document for Elementor, please visit Elementor DOC portal.
Smart Slider 3
Smart Slider 3 is the most powerful and intuitive WordPress plugin to create sliders that were never possible before. Fully responsive, SEO optimized, and works with any WordPress theme. Create beautiful sliders and tell stories without any code. A beautiful interface makes creating slides fast and efficient. The complete freedom to build what you want, the way you want. Edit your slides as you used to in page builders. Drop layers after each other and structure them with rows and columns. Enhance your slider with the layers and make your site even more unique and grandiose. Every heading, text, image, button, and video can be edited easily with the customization options. Change all the details that really matter in typography and style.
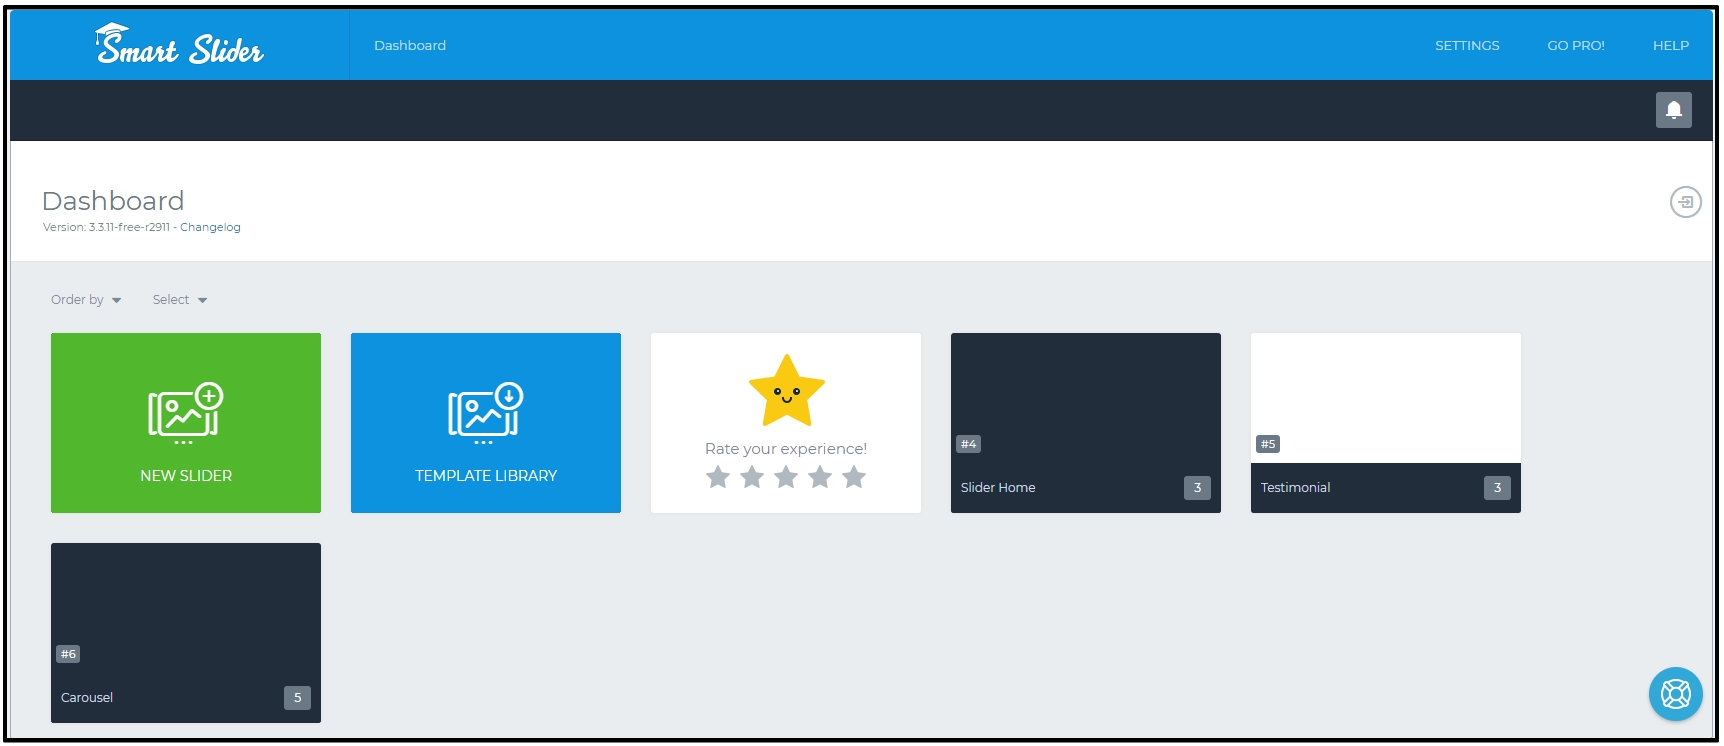
Also, check out our tutorial below on how to install and create a good-looking slider with Smart Slider 3 all from scratch:
Learn more about how to use Smart Slider, you can visit portal document for this plugin.
WPML Compatible
WPML makes it easy to build multilingual sites and run them. It’s powerful enough for corporate sites, yet simple for blogs.
You should activate the essential WPML components, which will allow you to fully translate your theme:
- WPML core plugin
- WPML String Translation add-on
To get them, go to your WPML account and click on Downloads.
Translating the Header
The theme’s or plugin’s header comes from the WordPress general settings as displayed in the following image:
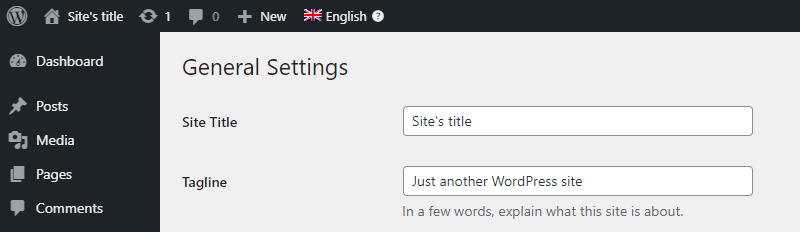
Since it’s not part of any post, we need to use WPML’s String Translation to translate it. Go to the WPML → String Translation page, search for the string by its content (i.e. “Site’s title”) and translate it.
![]()
Translating the Menus
WPML translates WordPress menus without you needing to do anything. As long as your theme uses the standard WordPress menu system, WPML will translate the menus.
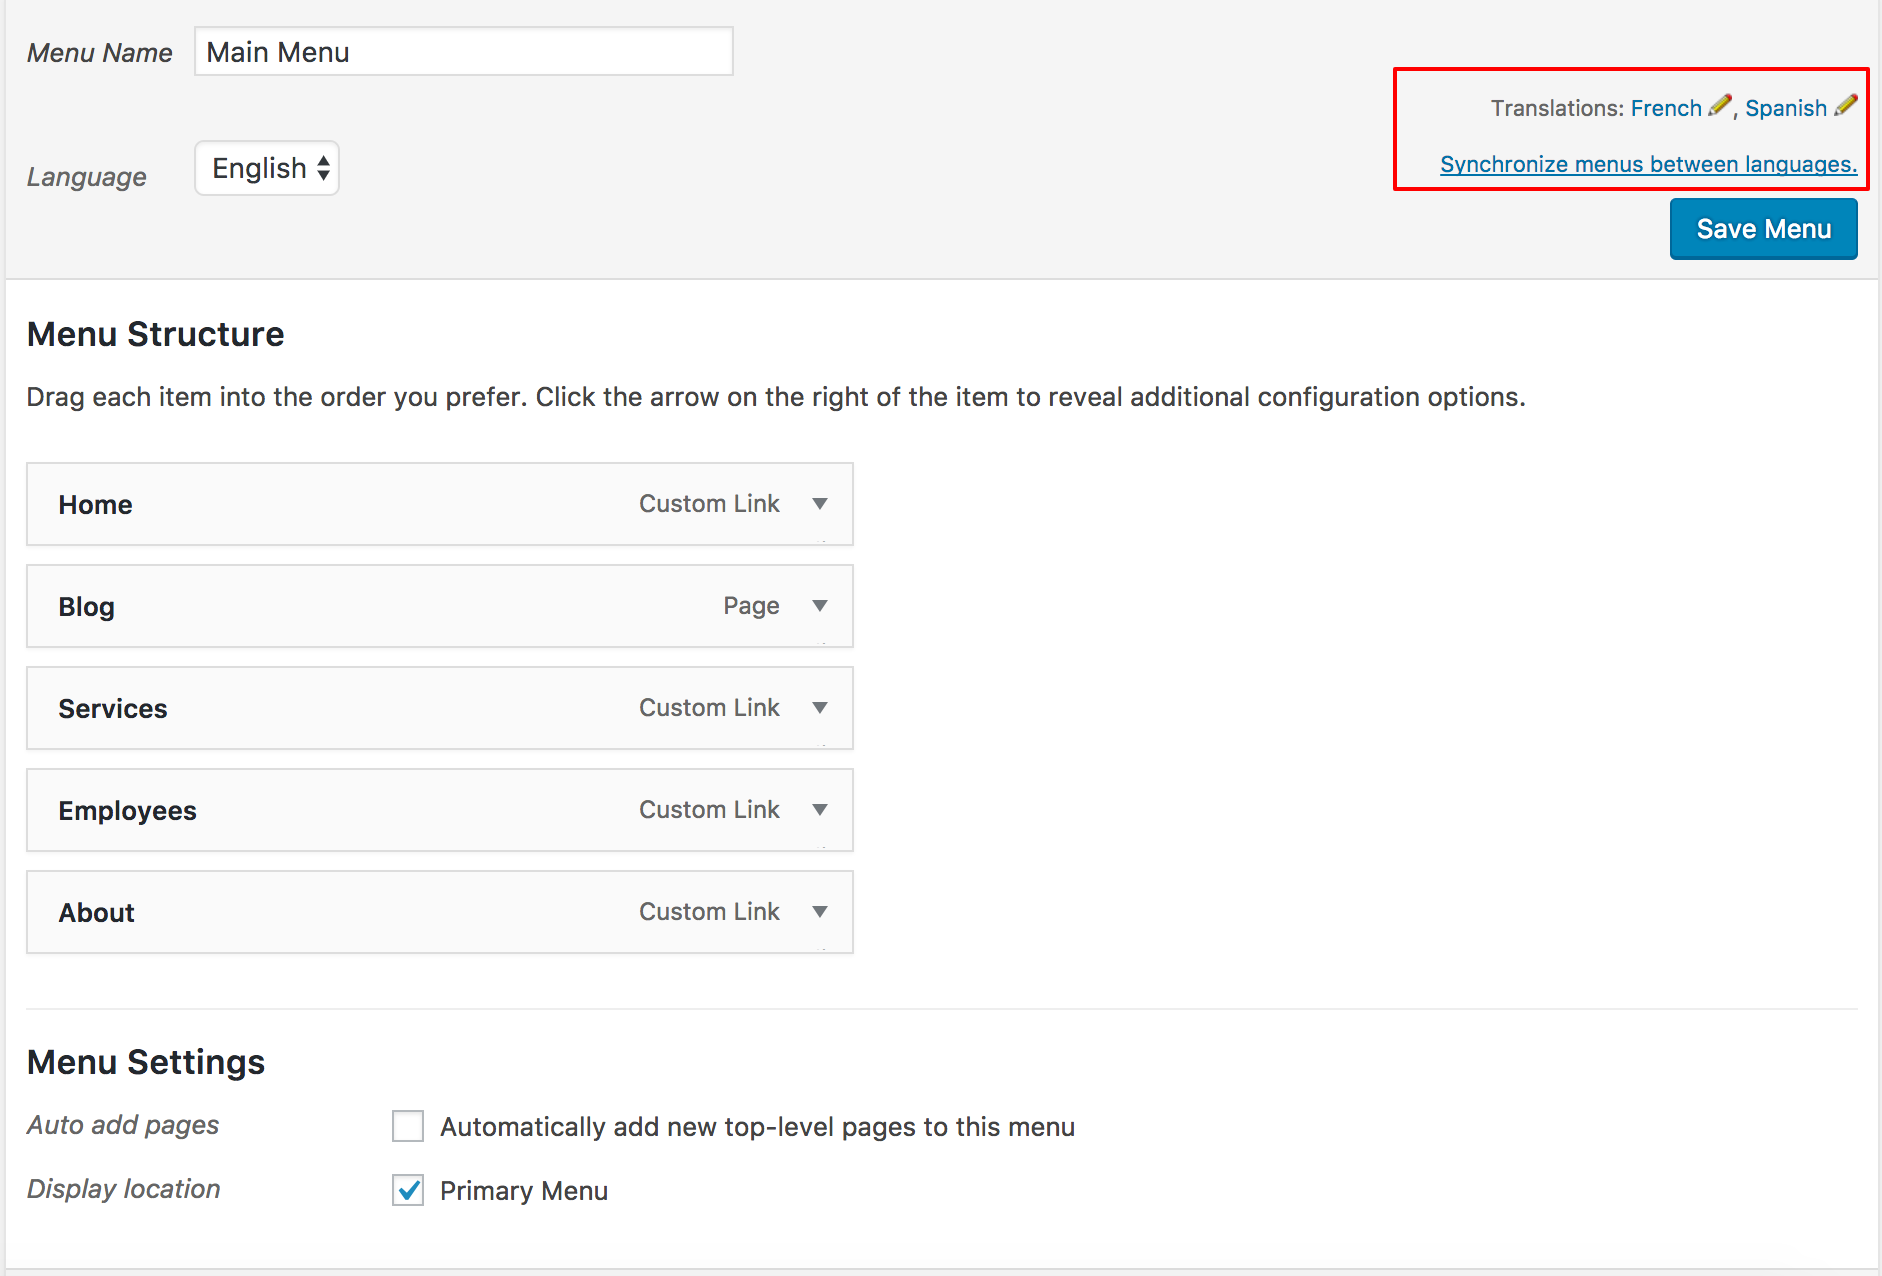
When you go to the Appearance → Menus page, you will see WPML’s menu translation controls. Learn more about translating menus to see how this works.
Translating the Custom Post Types
WPML allows three modes for translatable content:
Translatable, only show translated items
Translatable, use translation if available or fallback to default language
Not translatable
This gives you great flexibility in deciding what content gets translated and how the translations are displayed (or not).
Navigate to WPML → Settings and scroll down to the Post Types Translation. Select one of two Translatable options in the row(s) for the custom post types you want to be translatable and then Save.
Translating the Post Body
WPML lets users translate content with ease. The post-edit screens include WPML’s translation controls, allowing to create new translations and edit existing ones.
You don’t need to do anything in the theme or plugin to make this happen. Translating content is a core feature of WPML.
What you do need to check is that any text that your theme adds to the output is translatable. For example, the highlighted texts in this screenshot should be wrapped in gettext calls.
Translating the Footer
Just like many other themes, this one uses widgets to store the footer texts.
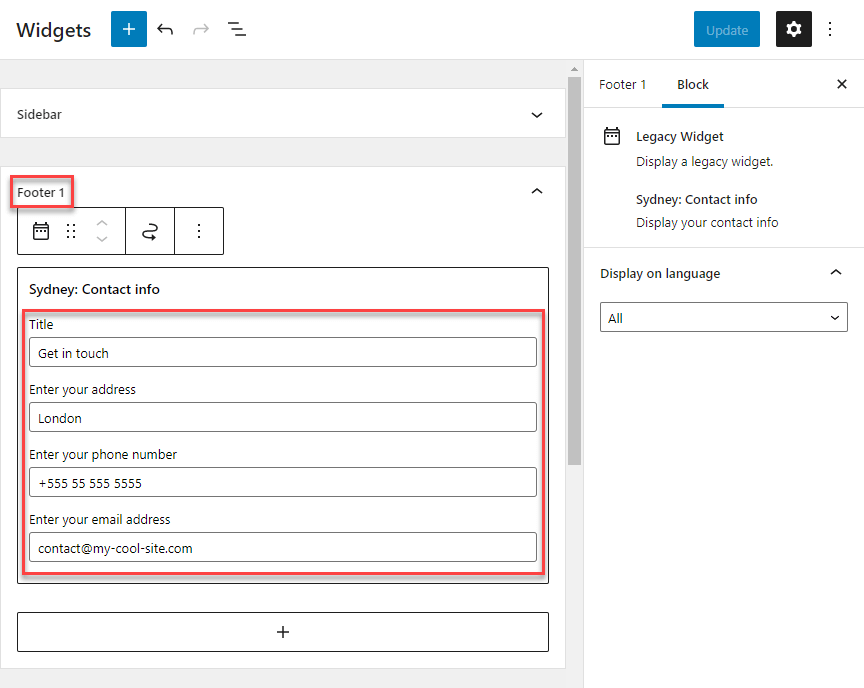
WPML allows users to translate the titles and content of your widgets via the String Translation screen.
Elementor Compatibility
Use Elementor with WPML and you can build any desired design and easily translate all your site’s content.
The Translate Everything Automatically mode automatically translates posts and pages built with Elementor.
Have a look at our guide on How to Build Multilingual Sites with Elementor and WPML or Translate Elementor Pages With WPML
Get your hands on the latest version of WPML with which you can easily translate all your WordPress pages in just a few clicks.
WooCommerce Compatibility
Themes that include a WooCommerce section may need to follow a few other suggestions. Mainly, you should use get_options to get the IDs of WooCommerce pages. Have a look at our guide on making WooCommerce themes multilingual and multi-currency-ready.
3CX Live Chat
We’re using 3CX Live Chat as FREE Live Chat for our product. This is strongly recommended for any business. You just set up and it’s ready to use. You can see 3CX FREE Live Chat WordPress plugin and features from WordPress.org
In order to activate your live chat you need to sign up with 3CX StartUP to get your web portal and apps to answer live chats.
- Get your free 3CX Account.
- Follow the steps in the wizard.
- Take note of the 3CX Talk URL that you will be given during the live chat step.
- Read our Getting Started Guide.
You also can watch this video to know more
Contact Form
Two best plugin for Contact Form, it’s WPForms and Contact Form 7 plugins.
WPForms
WPForms allows you to create beautiful contact forms, feedback form, subscription forms, payment forms, and other types of forms for your site in minutes, not hours!
The WPForms Challenge guides you through creating your first form in under 5 minutes. We walk you through using the form builder all the way to adding a form to a page on your site! WPForms includes integrations for popular page builders like the WordPress Block Editor (Gutenberg), Classic Editor, Elementor, and Divi making the whole process seamless.
Contact Form 7
Contact Form 7 can manage multiple contact forms, plus you can customize the form and the mail contents flexibly with simple markup. The form supports Ajax-powered submitting, CAPTCHA, Akismet spam filtering and so on.
Remove Footer/Copyright
Copyright on the footer which we defined for the theme, you can remove it by navigating to Appearance > Widgets > Copyright > click delete or edit Custom HTML.
Hosting Recommended
If you’re looking for good hosting for your website, recommend you with Hostinger web hosting provider. This hosting is fully compatible with our products. Extremely fast, secure and user-friendly website hosting for your successful online projects, get up to a 20x faster page load times, with unlimited bandwidth and a free cPanel license. Ultahost is recommended hosting from our team for all WordPress themes and Joomla! templates from our company.
Third-party Build-in Document
Extensions Build-in
CSS Libraries
CMS Using
WordPress CMS
Support system
Ticket System
Still have issue or need assistant with techical problems, feel free submit ticket support via Dedicated Ticket System, our support specialist will come and help you solve all issues shortly.
Install Service
If you want to install the Quickstart package on your hosting, you can order here.
Extra Services
Customization Task
If you want to hire our developer for the custom template, you can request it here.
Development Service
Looking for a new template for your project, and only use it for your website, ask our developer here.